

Residential Groundworks
Raft Foundation & Pouring Process (The AmtaarGC Way)
02
Nov
Nov
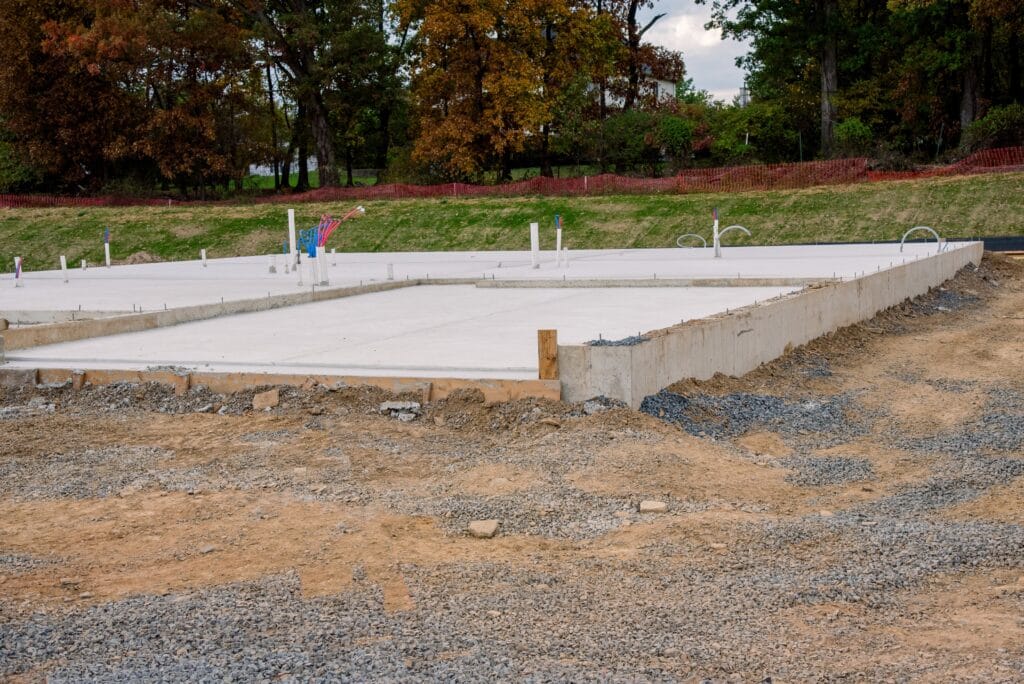
Raft (mat) foundations are our default solution for London’s mixed ground—spanning across the whole building footprint to spread loads evenly, control settlement, and simplify coordination of vertical elements (cores, shear walls, columns). Below is how we deliver rafts quickly, safely, and to spec—so your frame can rise without surprises.
When we choose a raft
- Variable or low bearing capacity soils where strip pads would over-concentrate loads
- Basements or water-resisting slabs needing continuous reinforcement and joint control
- Tight urban sites where programme and access demand a single, high-certainty pour
Our end-to-end sequence
1) Pre-pour prep (design + logistics)
- Confirm grid set-out and raft levels from our approved drawings.
- Agree joint layout, waterstops, and kicker locations early to avoid rework.
- Lock pump, concrete supply, crew rotations, and cube testing in the pour plan.
2) Blinding slab (clean, level, protected)
- Form and cast C20 blinding (typically 50 mm) to give a clean, level working platform.
- Polyethylene membrane over blinding to stop grout loss and keep the slab clean.
- Initial cure: wet hessian + polythene to prevent early-age cracking.
This mirrors best-practice steps like membrane placement, compaction, finishing and curing noted in a classic raft/blinding method statement (see the step list covering blinding, membrane, reinforcement, waterstops, vibrating and curing).
3) Edge formwork & kickers
- Install perimeter forms and kickers to establish wall positions and keep edges crisp.
- Confirm cover blocks/spacers (e.g., 50 mm) around reinforcement for durability.
4) Reinforcement fixing
- Fix bottom and top mats, local thickening, and column/wall starter bars per BBS.
- Tie construction joint waterstops centrally in wall lines, secured through web holes.
- QC hold-points: bar sizes, spacing, laps, cover, cleanliness, and photos for the QA pack.
Rebar, spacers and centrally fixed waterstops are explicitly called out in the reference method steps.
5) Concrete pour (our field routine)
- Directional casting: work in consistent lanes, maintain a steady front.
- Vibration: two running needle vibrators + one standby; compact every lift thoroughly.
- Mixer spacing: keep a controlled time gap between wagons to allow compaction/finishing.
- Surface finishing: aluminum straightedges, then steel/wood trowels; brush once stiff to relieve shrinkage.
- Housekeeping: keep wall steel clean—no splash coats on starters.
These practical pour controls—including time-lag between mixers, multiple vibrators, finishing and immediate brushing—are specifically listed in the method statement.
6) Curing & early protection
- Immediate curing: wet hessian + polythene, then continue as per spec for strength gain.
- No premature loading: follow our cube results / maturity curve before placing shutters or stacks.
Wet hessian + polythene and specified curing durations are highlighted as required steps.
QA/QC we include in every pour
- ITPs & checklists for form, membrane, rebar, embeds, MEP penetrations.
- Concrete verification: delivery tickets, temperature, slump/flow, air (if specified).
- Cubes and daily records tied to weather logs and pour zones.
- As-built photos of rebar, waterstops, and interfaces for Building Control packs.
Daily reports, weather records and inspection/records are standard in the cited methodology.